Wednesday, June 29, 2011

Oyster/ Mussel recipes


We got not many chances to eat mussels (kallummakkai as we call it or kadukka as in southern Kerala) in our childhood. It was clams clams clams, every now and then.  In Amma's place they got a kind of  white clams with shells and then it was a huge process to bring them to the dining table. But in my father's place we were accustomed to buying the meat of dark clams that grew up in rivers.

 An old woman from the river side came to sell clam meat. she would carry it in a basket on her head and she chewed betel all the time. Out of excessive betel-chewing she had white lesions by her orange lips. Her visits were looked upon with a special interest by the entire family. All of us had a common interest, that is we all loved to eat clams, at the same time each of us had an individual reason for anticipating her visits.

Achamma had a nice time enjoying her gossips(nothing harmful..just sharing the new happenings..in the village). The old woman easily got agitated if you doubted the genuieness of her clams or her deal as a whole and Amma loved to tease her that way..though she was actually fond of her.
My interest was none of these. I was fascinated by the wooden measuring cup she carried and loved the way she measured the clams and dropped it in to our "manchatty".

Cleaning of clams took ages. We children always wanted to take part in it. squeezing out of the black mass from every tiny clam required a lot of time and patience.  later in life, Amma entrusted us with this tough job especially when servants were absent or at times it was given to us as a punishment for misbehavior. What an idea..!!! :)

Achamma and Amma roasted the clams in "uruli" on low flame for a long time adding spices and a lot of coconut scrapes. Some times they were roasted so hard  inorder to send to my Father or other relatives who lived abroad. Another option was clam curry, cooked in ground coconut gravy and mangoes, fresh green mangoes or  dry mango slices.

During this period, eating mussels happened very rarely. But things changed with the passing of time. A young woman, her name was Rema and she pronounced it in a curious way, started to bring mussels, prawn meat(which costed a fortune) etc, travelling all the way from Paravoor to our village. 
Mostly we made mussel masala at home, but have got chances to eat mussel pickle from my aunt's place which her sister in law..brings from Wyanad and also the "kadukka " fried dipping in rice batter from Kozhikode-the centre of kadukka lovers, when I visited my sister who lived in Kozhikode sometime back.

Kallummakkai chilli masala
 
I got some oysters and cooked them in the same way we cook mussels. Back home I'm used to only mussels, not oysters but there is no big deal..both tastes almost the same. They have some differences, may be in life style. mussels are happy with a stagnant life while oysters love to move around...Here even when u buy cooked oysters or mussels they have the black mass in it. I always squeeze them out though most of the people eat it wholly. There are differences of opinion regarding this. But I think its better to be safe than sorry.


Ingredients

1. Mussels or Oysters - 500 gm
2.Green chilli- 6-7(its chilli masala..so very hot...if you don't want it hot add not many chillies)
3. Ginger- one small piece.
4.Onion- 2
5.Tomato- 1 large
6.Coriander leaves- chopped- 2 tablespoon
6.turmeric powder- 1/2 teaspoon
7. chilli powder- 1/2 teaspoon
8. Garam masala powder- I teaspoon
9. salt- as required
10.coconut oil- as required

how to cook

1. Clean oysters very well and keep aside in a sieve to get rid of all water from it.
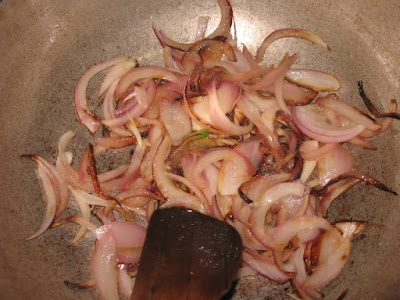
2. Cut onion in to thin long slices.
3. Cut green chilli in to halves( length wise)
4. chop tomato in to small pieces.
5. Cut ginger in to very thin long slices
6. heat a bottom heavy pan. pour oil in to it.
7. saute well onions, ginger, chillies and tomatoes adding one by one.


8. Add turmeric powder, chilli powder and garam masala powder.
9. When oil separates add oysters and mix well.


10. pour a little water and keep the lid closed until oysters are thoroughly cooked.
11. Now keep the lid open and let it dry out. stir occasionally to avoid oysters sticking to the pan.
12. When roasted well garnish with coriander leaves.

13. serve hot.

oyster chilli masala


Mussel/oyster fry

I used frozen (pre-cooked) oysters for this. But fresh ones are always good.

INGREDIENTS

1. oysters or mussels- 500 gm
    Clean them thoroughly. Even if you buy pre-cooked ones u get that black mass in it. If you don't want to eat it  just squeeze them out
2. shallots- 4-5
3. green chillies- 2-3
4. turmeric powder- 1/2 teaspoon
5. Kashmiri chili powder- 1 teaspoon
6. crushed black pepper  - 1/2 teaspoon
7. salt - as per taste
8. Garam masala powder- 1?2 teaspoon
9. lime juice or vinegar- a little.
10. curry leaves-  a handful.
11.  fennel seeds- 1 teaspoon
12.  canola oil( or any oil)- 1/2 cup


Method

1. mix well the masala powders and lime juice or vinegar.
2. add oysters to it and coat them well with the masala.
3. if you are using pre-cooked mussels marinate them for 1/2 hr or more.
4. If you use fresh ones after applying masala cook it in a pan with closed lid.
5. Now heat a bottom heavy pan. pour oil
6.  Let fennel seeds to pop in the oil. Add shallots, green chillies and curry leaves. stir fry
 7. Add cooked oysters and stir fry until they are browned well.


oyster fry


Saturday, June 4, 2011

Mushroom Masala &Mushroom Thoran

Suddenly..one day....we two little girls got replanted from a small flower pot in to a large landscape full of light and air. That is we shifted our restricted life from an apartment in Sharjah in to a beautiful house surrounded with lush greenery in a coastal village of Thrissur. We embraced plenty of blessings, like rain, swings, touch- me- nots, golden-showers, butter flies and what not. But somewhere inside we children missed many other things, green or red glossy tooth pastes, butter-like birthday cakes decorated with real toy..animals....we had brought some of them with us..., thin square cheese, pickled olives, sausages and ofcourse mushrooms.

King oyster mushrooms
Amma thought her mixed fried rices were not complete without those mushrooms and spring onions. It wasn't possible to go to a store and buy a pack of fresh mushrooms or canned ones in our small village. But mushrooms grew by their own in our surroundings.  They sprung up from nowhere and smiled at us in the mornings drenched in night rain.  They fancied me as little umbrellas and I wished they would grow overnight in to large umbrellas so as to accommodate us-the children- under its shade.

But all of them were not edible. Many of them were dangerously poisonous. Achamma knew how to differentiate between the edible and inedible ones. If there was a little doubt it had to be discarded. And they were washed after soaking in turmeric water for a while.Lately Acha and Amma followed her ways. We get only a few good ones..not enough to make a curry for all, never enough to satisfy our greed. And they grew as they wished, not when there were guests and Amma wanted to go for a mixed fried rice. Acha himself scrambled the mushrooms with eggs and we kids enjoyed every bit of it. At a point of time Acha and Amma had serious plans on mushroom farming and read a lot about it. For some reason that didn't happen. And gradually it became possible to travel to Thrissur town and buy fresh mushrooms. And also it became common to eat chilli mushroom, mushroom manjurian..mushroom soups from chinese resturants.

Here I'm to share with you two mushroom recipes, not continental, not chinese , but the recipes made to excite the typical malayali taste buds!!!


 Mushroom masala

Ingredients:
Milky mushroom slices- 2 cups
onion thinly sliced- 1 large
tomato - 1 small
green chilli- 2
garlic crushed- 1 table spoon
ginger crushed- 1 table spoon
turmeric powder- 1\2 teaspoon
red chili powder- 1 teaspoon
corriander powder- 1 tab spoon
garam masala- 1 table sppon
corriander leaves chopped-  2 tablespoon
oil
salt

how to cook
1. heat some oil in a pan.
2. stir fry ginger and garlic paste.
3. As it turns golden brown and that special aroma kicks out, add onions and green chillies.
4. Saute them well untill cooked and slightly brown.
5 .Reduce the heat and now add the masala powders one by one.
6. When Masala's are cooked add tomatoes and stir well.
7. Now add mushrooms and close the lid. for 15 minutes.
8. Add curry leaves and keep the pan open on the fire until the water is completely absorbed, stirring now and then to avoid sticking on to the bottom of the pan.
9. Remove from fire and garnish with corriander leaves.

Mushroom masala


Mushroom thoran

Ingredients:
king oyster mushroom(other kinds will also be fine)- 250 gm   (cut in to tiny cubes).
green chilli- 4
crushed red chilli- 1/2 teaspoon
ginger- cut in to tiny pieces- 1 tb spoon
garlic- chopped- 1 tb sp
shallots - 3
mustard seeds - 1 tespoon
turmeric powder- 1/2 teasppon.
curry leaves- a few
whole dry chilli - 2
coconut oil- as required
salt- as required
coconut scraped- 1/4 cup.


how to cook

1. In a pan heat some coconut oil.
2. splutter mustard seeds.  Then fry whole dry chillies and curry leaves.
3. Now add ginger and garlic and stir fry until golden brown.
4. Add shallots and green chillies and continue stir frying.
5. If you don't want it to be spicy.....don't hesitate to add lesser number of green chillies. If you like it really
    hot....now its time to add crushed red chilly.
6. Add turmeric powder and salt and finally the mushrooms.
7. Keep the pan closed for 10-15 minutes.
8. Make sure the mushrooms are cooked.
9. Add coconut scrapes and mix well.
10. cook well another 5 minutes stirring occasionally.
12. Thoran is ready....enjoy with rice.
Mushroom Thoran

Tuesday, May 24, 2011

Egg plant recipes

Brinjals, was the only English word known to me for "vazhuthananga", the purple egg-shaped vegetable when I lived in my home country. After coming to Canada its egg- plant everywhere, in the stores, restaurants..everywhere....but they r no more necessarily egg shaped, they come in different shapes....and the most common ones are the long egg plants, though long they pleased me well with their deep purple glossy skin and spongy flesh inside same as their Indian counterparts.
In my child hood eggplants were meant mainly for  "mezhukkupuratty" and I simply disliked them. As a rule disliked foods were never discarded, so had to eat them very often. Amma was good at cooking but sadly she never experimented on eggplants. Brinjals occasionally decorated our table as "THENGAPALOZHICHA KOOTTAN",  but that too was not very welcome to my tongue..though my sister thoroughly enjoyed all vegetables cooked in  coconut milk.

Years passed by and  on one evening as I came back from college, my eyes got widened at a welcoming sight. Amma was busy by the stove and on the fire was a fry pan with thin slices of eggplant bubbling in the hot oil. 
That was a time when Amma bought vegetables from a vendor who came to our house once a week. He was thin with a dark beard covering half of his face and we thought he looked like  Hareeshri Asokan, the movie actor or to be more truthful we thought the actor whose name we did'nt know at that time,  looked  very much like our vegetable vendor  and when ever we saw him on screen we called him "PACHAKKARIKKARAN".  And from this vegetable vendor Amma got the idea of frying brinjals. She offered me fried egg plant slices with rice and I wanted to finish it all in a minute. How come those cold .....emotion-less( vikaramillatha), that was exactly the word we used, become this interesting??? I was totally happy and Amma was also happy to see me happy. We felt indebted to our vegetable seller. Then on fried egg plants and morukoottan, that was the most acceptable combo,  made my lunch box exciting.  And finally driving inspiration from the fried egg plants I made an eggplant-tomato curry for which I got a grand applause from my family.  Even now, after...many years of experimenting, discovering and inventing other recipes,   I treat my guests with this easy-to-make curry, when ever I do so I'm confronted with a surprised "how did u.....".
Here I'm sharing two recipes of egg plant, the first one my own eggplant tomato roast and the second one egg plant in yogurt which I learnt from a Pakistani  acquaintance.

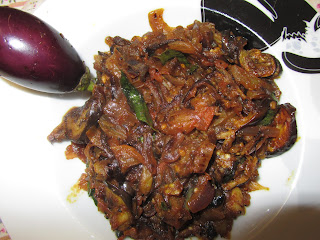
Eggplant tomato roast.


Ingredients
1. Egg plant - 5 -sliced in to thin circles ( here I have used Indian egg plants....the long one will also do well)
2. onion -  1 large
3. tomato- 1 large
4 turmeric powder- 1\2 teaspoon
5 chilly powder- 1 teaspoon
6 salt -as required
7 oil - 1/2 cup
8. curry leaves


Method

1. slice egg plants in to thin circles.
2. rub them with some salt and keep aside for 15 minutes.
3. shallow fry them in hot oil at medium heat.
4. In a pan pour some oil and stir fry onions until golden brown. Add turmeric powder and chilly powder. stir well.
5. forget not to add your salt
6  now add tomatoes and curry leaves. close the lid.
7. when the tomatoes are cooked, add fried egg plants and mix well.
8. As the oil begins to come out....remove from fire
    serve hot with rice or chapathi.or even bread.....!!


Eggplant in Yogurt


Ingredients


1. Egg plant (I have used the round ones...long ones are also ok)- sliced in to thin circles- 4
2. chilli powder- 1|2 teaspoon
3. turmeric powder - 1/2 teaspoon
4 salt- as required
5. cumin seeds- 1 teaspoon
6. water- a little
7. yogurt- 1 1/2 cup
6. oil- for frying

how to prepare


1. mix well chilly powder, turmeric powder and salt  using some water to make a smooth paste.
2. marinate the egg plant slices in this masala paste
3.keep aside for 15-20 minutes
4. heat oil in a fry pan and shallow fry the egg plant slices.
5. In a clean bowl take the yogurt , add some salt  and stir well.
6. Now add the fried egg plant slices in to it and mix well using a spoon. let them soak in the yogurt and get    softened.
7. In a small pan heat a little oil and splutter the cumin seeds.
8.when cool pour it over the yogurt-egg plant mixture.

Thursday, December 30, 2010

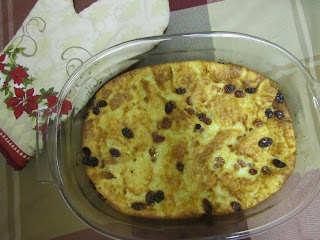
Bread Pudding


Yet another year is passing off the lane of life and  we all are getting ready to welcome a new year with mixed emotions.  A New year always brings in nostalgic memories of the bygone days, sadness of losing a portion of your life...on one hand...,excitement and anticipations about the coming days..on the other.
All home-cooks out there must be busy planning for the new-year eve dinner. Usually when making a feast I confront with a problem..and I'm sure , if not all ..at least a few  others too go through the same situation. I spend enormous time planning and preparing starters and main course dishes..and end up in making very simple dessert.  And most likely the guests also hardly enjoy an elaborate dessert after a heavy dinner. 
Here I'm with simple bread pudding recipe which u can prepare without much effort. And usually bread puddings impress me for a special reason . You don't have to ransack the store shelves reading names that look like Greek for the ingredients. Instead just  pull them out of your refrigerator.


Ingredients
1.  White Bread slices- 5
2. Whole milk- 2 cups
3. Butter-  1/2 cup
4 eggs -three
5 vanilla extract- 1 tea spoon
6. cinnamon powder - 1 teaspoon
7 raisins- 1/2 cup.
8.sugar- 3/4 cup
9. salt- a pinch


Method:
1. remove the crust of the bread slices and keep aside.
2. heat milk in a pan over low flame. need not boil.
3. add butter to it and stir slowly until the butter melts.
4. take it off the stove top and put aside to cool.


5. heat the oven at 300 dg and prepare a baking dish by brushing some butter or oil at the bottom.
6. mix well the eggs, sugar ,salt and vanilla using an electric mixer or beating thoroughly.
7. when the milk is luke warm add the beaten egg in to it and stir well.
8. cut the bread slices in to medium squares and arrange them at the bottom of the baking dish.


9. sprinkle 1/2teaspoon of cinnamon powder over the bread pieces.
10. now evenly distribute the raisins over the bread pieces.


11. pour down the milk- mixture neatly over the bread.
12. make sure all the bread pieces are fully immersed in the  milk sauce.


13. sprinkle the remaining cinnamon powder.
14. bake for 40- 50 minutes or until the fork inserted in the middle comes out neatly.


Now the bread pudding is ready. Serve it hot...very apt for a chilly winter night.
A very HAPPY NEWYEAR to all!!!

Tuesday, November 2, 2010

Oatmeal cookies

 These days we are realizing more and ,more of the health benefits of oats. A bowl of oats along with a portion of blueberries is said to be the perfect way to begin a day with. Many of us might have already taken up the "Quaker oats challenge" to keep your heart healthy. Oats are a significant source of both soluble and insoluble fiber. Its not only good for your heart but also possess cancer-fighting properties. Oatmeal is also a friend of those who are into losing weight. Oatmeal is rich in vitamin B which is significant for the brain and nervous system to function properly. If that is the case shouldn't we  include oats in our daily diet?

Now you guessed it right, I"m her with an Oatmeal recipe, to make it clear an oatmeal-cookies recipe. Children are lovers of cookies. Not only children we grown-ups also don't mind having cookies regularly or at least occasionally.  And the store shelves are glutted with wide variety of cookies in all shapes and flavours to attract the customers. But always its much healthier and also highly gratifying to make your own cookies for your kids and guests. In a way I'm sorry that my little girl doesn't want a bite of it, otherwise I could have made more and more cookies and cakes for the sheer fun of baking. On the other hand I"m happy that she doesn't have a sweet tooth, that she simply rejects ice-creams and chocolates and asks for green peas or broccoli.
Usually most cookies are made of white flour(all purpose flower or maida) Even in oats cookies we add a little bit of white flour to hold the oatmeal together. I would say this recipe is much healthier because It is made with oats and whole-wheat flour or Atta.  I think our Indian Atta would make mixing easier than whole-wheat flour that u get in Canadian stores. And yet another surprise is the adding of jaggary.

Ingredients
  1. Quaker oats- 3 cups
  2. Walnut- 1/2 cup.
  3. Raisin- 1/2 cup.
  4.  Atta- 3/4 cup.
  5. Baking soda- 1 tea.sp.
  6. Sugar- 1/2 cup.
  7. Jaggary(crushed and lightly packed)- 1 cup
  8. Butter- 1/2 cup.
  9. Egg- one large
  10. Vanilla essence- 2 tea.sp.
  11. Cinnamon powder- 1 tea.sp.
  12. Water- 1/4 cup.


Method.

1. Sift well flour and baking soda using a sieve.
2. In a heated pan dry roast the walnuts for a minute stirring continuously. Now chop them in to small pieces.
3. In a mixing bowl add butter, sugar, jaggary, egg one by one and thoroughly mix using an electric mixer.
4. Now add up the flavourings and mix well.


5.  When all wet ingredients are blended smoothly now its the turn of the flour mix. Add the sieved flour little by little.


6. Mix in Oatmeal  using your hand by sprinkling water as needed.


7.  Combine nuts and  raisins in to the mixture.

8. Roll the oatmeal mix in to equal sized balls in the size of a large lemon.
9. Prepare a baking tray by brushing oil and dusting with flour.
10. Arrange the balls on the tray with space between each ball.


11. Bake as it is, if u need moist cookies. Flat the balls with fork for crunchy cookies. I prefer crunchy ones:)

12. Bake the cookies in a pre-heated oven in 350 deg for 20-25 minutes

Now its time to surprise your family!!!


Monday, October 18, 2010

Green Pepper Chicken


I have to say what I said in the earlier post, ( that I am  the only cook in my house )  is only partially true. These days I get not many chance to cook chicken, especially Kerala's very own chicken curry. Because Sterly has taken up the task of making  chicken curry. This practice all got started to pamper his pregnant wife...but don't misunderstand ..here pampering does not mean making dishes  which I was craving for but sympathetically sparing me from the toil of cooking something that I wouldn't eat.. He cooks chicken and only chicken because he is a die hard fan of chicken.Once upon a time  I  too had been but gave up eating poultry and meat many years back. So I haven't got a chance to taste his recipe ..yes..of course he had fried fishes n made omelets occasionally in the past ...but nowdays i don't get any. How ever if chicken has to take a form other than usual chicken curry I am sure to lay my hands on it.
Thus last week I decided to surprise my hubby by making something different than usual and pulled out the single boneless thigh of chicken that was left in the freezer. I had some green peppers also which i had to use somewhere . But I didn't want to go for Chinese since we have had enough of it the previous week. Hence this green pepper chicken recipe was cooked up in my mind instantly  and chicken was made accordingly. For this chicken is cooked and striped off in to long thin strands. When a small girl I loved to watch Amma tearing  off cooked chicken so as to add up with the mixed  fried rice and I used to even plead to do it myself. When ever she let me do  I simply felt so happy thinking I have made a significant contribution in the making of fried rice. 
My hubby loved my Green pepper chicken but I have no idea how other chicken lovers would count it.
please try this out and let me know how you liked it.

Ingredients 
  1. onion- 1 small  thinly  sliced
  2. green pepper - 1( medium) cut in to long thin slices
  3. ginger chopped- 1 tb.sp 
  4. garlic chopped- 1 tb.sp
  5. black pepper powder- 1 tb.sp
  6. green chilli- 2
  7. coriander powder- 1.1/2 tb.sp
  8. vinegar- 1 tb.sp
  9. curry leaves- 10
  10. salt- as required

11. boneless chicken  cooked and striped in to long strands - 2 cups. (if u are using chicken  with bones simply discard the bones)
oil- as required


Method

1. Heat a thick bottomed pan on the stove. pour some oil and when sufficiently hot  stir fry onions, ginger and garlic until they turn golden brown.
2.  Add  coriander powder, pepper powder, salt and vinegar one by one.
3. As the spices gets cooked up add green pepper and chicken. stir well. close the lid for 5 minutes.
4. Now add chillies and curry leaves....stir fry on high flame until the chicken is dry.
5. Garnish with tomatoes.


Green pepper chicken
note-  while cooking the chicken add some salt and pepper. if u have any gravy  left pour it in to the pan along with the green peppers n chicken strands, ie, during the 3rd step.

Thursday, October 7, 2010

Tomato Aviyal and Chutney

Green Tomato Aviyal

A couple of weeks ago, got some fresh green tomatoes straight from a friend's garden. I was totally new to the idea of cooking green tomatoes. So it lay there in my fridge unattended for days. Finally I made up my mind to do something about it as it  would be unpardonable and even disgraceful to let those close to spotless garden fresh tomatoes to spoil. As I took them out of the refrigerator several ideas flashed in to my mind. Why not I add the raw tomatoes to fish curry instead of green mangoes? Making a "Thakkali Thiyyal" is also a good thought. But preparing  thiyyal demands a lot of time. It involves roasting and grinding of coconut scrapes..for which I was not ready, not that I was pressed for time but out of sheer laziness. After a long thought I decided upon Pachathakkali Aviyal, an aviyal with raw tomatoes.
Aviyal has always been my favorite except for a short span of time, that was when my mom decided to stick her ever sick child to naturopathic cure system . At  Balya hospital lunch was always the same, the unpalatable brown rice that almost looked like a pudding and an Aviyal which was always a cold  lump of vegetables devoid of all flavors. How could someone ever cook Aviyal that way?
All other Aviyals I have had, Amma's delicious Aviyal, and those unbelievably dry Aviyal served   during feasts , have satisfied my palate.
To my relief the raw tomato aviyal came out well. Unlike the real Aviyal this one is sour, hence adding up of yogurt or tamarind at the final stage is totally avoidable.


                                                          Ingredients

1. Green tomatoes- 3-4 (cut in to cubes)
2. onion  - 1/2 (sliced)
3. Green chillies- 4
4. ginger - 1 small piece
 5. grated coconut - 3\4 cup
6. cumin seeds- 1 teaspoon
6. curry leaves - 7-8
 7. turmeric powder- 1/2 teaspoon
8.coconut oil- 1 1/2 tb.sp
9. salt- as required


Method

1. In a cooking vessel mix tomatoes and onion with salt and turmeric powder. Add some water that is required to cook the vegetables. place on the stove covering with a lid.

2. Coarsely grind grated coconut, cumin seeds, green chillies and ginger using a grinder.

3. When tomatoes are cooked well add the ground coconut in to it. Mix well with a spatula. Again cover it with the lid for five minutes at medium heat.

4. Once the aviyal is cooked put off the flame and add coconut oil and curry leaves. close the lid for two minutes...and now you open to breath in the mouth watering aroma of Aviyal


Tomato Chutney

This Thakkali Chutney was introduced to our breakfast table by Valli many years back. Valli,our long time house maid  and now the house manager is from Madurai, Tamilnadu. Valli's real name is Saundravalli and for some reason she is ashamed of the fact and insists on calling her Valli. Years back when she came in to assist Amma with house hold chores she was almost ignorant of cooking still she had the recipe of this bewitching thakkali chutney in her pocket. The old story has changed remarkably. Valli is now popular as a wonderful cook and when I fly back on holidays to a mother-less home with the yearning to take a break from my cooking( if you are the sole member in your family who would cook you would be for certain craving to relax and eat what somebody else' cooks in spite of  how good you are at cooking) I can simply sit back enjoying valli's dishes all made according to our family's tradition.

Since Valli presented her tomato chutney it has been a must with dosa. I even loved it with steaming rice and hence Amma many a time put it in to my lunch box during  college days.


 Ingredients


1. Ripe Tomatoes - 2 large
2. Shallots- 4 small
3.Garlic - 4-5
4. Green chilli- 4 ( if not a fan of hot chutney reduce the quantity)
5.Corriander leaves chopped- 1/2 cup.
6. Chilly powder( preferably Kashmiri chilly powder to  give  it  the red hue)- 1 tb sp
7. Turmeric powder- 1/2 teaspoon.
8. Salt - as required

9.Fennel seeds- 1 tea spoon

10. Mustard seeds- I tea spoon
11. Dry red chilly- 2 cut in to halves
12. Curry leaves-  5-6
13. Oil - 2 tb.sp

Method

Pour 1 tb.sp of oil in to a heated pan. Put fennel seeds in to it.  When the fennel seeds pop up add  those ingredients from 1 to5 one by one and fry for a minute. Now add salt, turmeric powder and chilly powder. Close the pan with a lid until tomatoes and spices are cooked well.  Remove the pan from the stove and let it cool. When cooled grind it smoothly in to a paste.

set aside to cool
Place a small pan on the stove. Heat 1 tb.sp of oil. Add mustard seeds and as it splutters add dry chillies and curry leaves. Fry until they are crispy. Pour this on to the chutney.


Tomato Chutney